How to Deploy Proxmox on Bare Metal: A Step-by-Step Guide

Proxmox is a powerful, open-source virtualization platform that allows you to run virtual machines and containers on a single physical machine. It’s based on two main technologies: KVM (Kernel-based Virtual Machine) for virtual machines and LXC (Linux Containers) for lightweight containers. This guide will walk you through the steps to deploy Proxmox on bare metal (a physical server or workstation).
I wanted to deploy Proxmox to deepen my understanding of virtualization while setting up a homeserver to fulfill some personal needs. This includes labbing technical networking concepts such as cloud networking, running pfSense as a firewall/router to manage security and network traffic, and setting up a Pi-hole instance to stop intrusive and unwanted DNS based ads.
Prerequisites
Before starting, ensure you have:
- A server or workstation that meets the minimum system requirements for Proxmox.
- A bootable USB drive with Proxmox installation image (downloadable from the Proxmox website).
- A keyboard and monitor connected to the server for the installation process.
Step 1: Download Proxmox ISO
- Go to the official Proxmox website: https://www.proxmox.com.
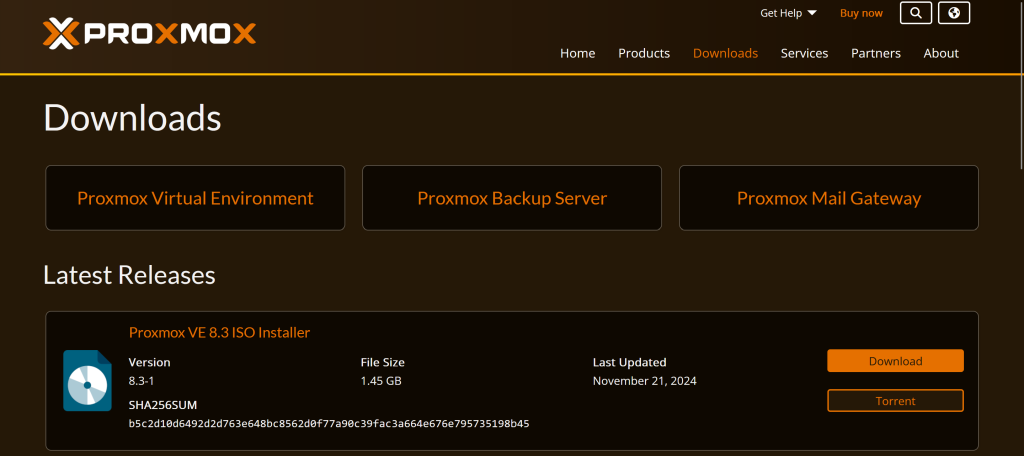
- Navigate to the Downloads section and select the latest Proxmox VE (Virtual Environment) ISO.
- Download the ISO image to your local machine.

Step 2: Create a Bootable USB Drive
To install Proxmox on bare metal, you’ll need to create a bootable USB drive. Here’s how to do it:
On Windows:
- Download and install a tool like Rufus from https://rufus.ie/.
- Plug in your USB drive and open Rufus.
- Select the Proxmox ISO image you downloaded.
- Choose GPT Partition Scheme and UEFI as the file system.
- Click Start to create the bootable USB drive.

On Linux (using dd):
- Open a terminal.
- Use the following command (replace
path-to-proxmox.isoand/dev/sdXwith the correct paths for your system):
sudo dd if=/path-to-proxmox.iso of=/dev/sdX bs=4M status=progress && syncStep 3: Boot From USB
- Insert the bootable USB drive into the server and restart it.
- Access the BIOS/UEFI settings of the server by pressing the designated key (usually
F2,F12,DEL, orESC). - Change the boot order so that the USB drive is the first boot option.
- Save and exit BIOS/UEFI, and the system will boot from the USB drive.
Step 4: Install Proxmox
Once the server boots into the Proxmox installer, follow these steps:
- Select Install Proxmox VE: Use the arrow keys to select this option and press Enter.
- Agree to the License: Read and accept the EULA to continue.
- Choose the Target Hard Drive: Select the hard drive where Proxmox will be installed.
- Configure Proxmox Network: Set up the network interface for Proxmox (you can configure this later, but it’s best to set up a static IP address at this stage if possible).
- Set the Proxmox Password: Enter a strong password for the root user of the Proxmox server.
- Set Time Zone: Choose your time zone from the list.
- Confirm Installation: Proxmox will show a summary of your choices. Click Install to begin the installation process.
Step 5: Access the Proxmox Web Interface
Once the installation completes, you can access the Proxmox web interface.
- The installer will prompt you to remove the installation media (the USB drive) and reboot the system.
- After rebooting, open a web browser on another device connected to the same network.
- In the address bar, type the IP address of the Proxmox server followed by the port
8006(e.g.,https://192.168.1.100:8006). - Log in using the root user and the password you set during installation.
Step 6: Update and Configure Proxmox
Once logged into the Proxmox web interface:
- Go to the Datacenter section, and under the Updates tab, check for any available updates.
- Apply updates to ensure that your installation is up-to-date.
You’ve successfully deployed Proxmox on bare metal! You can now start creating virtual machines, containers, and manage your server through the easy to use yet robust Proxmox web interface.
Leave a Reply